Quick Start with CLI
The fastest way to get started is using our CLI:Prerequisites
Before you start with LaunchYourApp, you need to have the following installed:- Node JS Latest Version
- Git for version control
- Expo GO
-
Expo CLI
or
-
Eas CLI
or
-
Watchman (for macOS users)
For iOS development
- A Mac running macOS
- Xcode
For Android development
Running the Project for the first time
After you make the purchase, you will receive a key which you can use to activate the product.Visit https://launchyourapp.dev/activate and enter the key and your github username to activate the product.
You will then be invited to the private repository where you can access the codebase.Clone the repository to your local machine and chose you repo name:
Update the project name
To update the project name, go to your 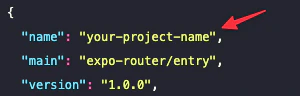
package.json file and change the project’s name.Update env variables
To run LaunchYourApp, you will need to update the.env file with your own values.
- Open the
.envfile in your project directory. - Replace the
EXPO_PUBLIC_SUPABASE_URLandEXPO_PUBLIC_SUPABASE_ANON_KEYwith your own values, you can find a tutorial on how to setup Supabase here - Replace the
SENTRY_DSNwith your own value, you can find a tutorial on how to setup Sentry here - Replace the
EXPO_PUBLIC_GOOGLE_WEB_CLIENT_IDandEXPO_PUBLIC_GOOGLE_IOS_CLIENT_IDwith your own values, you can find a tutorial on how to setup Google Authentication here